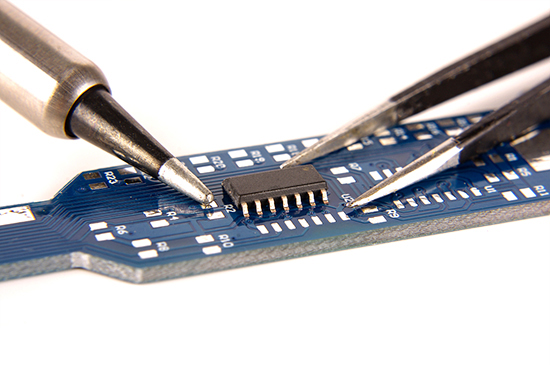
Operation Steps for Manual Placement of Components
In the case that the components are in bulk or the pins are deformed, we can choose to mount components manually. So do you know the operation steps of manual placement of components?

1. Preparation before placement
Before manual placement, it is necessary to apply flux and solder paste to the soldering part of the circuit board. The flux can be directly applied to the pads with a brush, and the solder paste can be printed by hand with a simple printing tool or manually dripped.
2. Manual placement tools
SMT components are placed using manual placement tools. The tools for manual placement are: Stainless steel tweezers, vacuum pen, 3~5x desktop magnifying glass or 5~20x stereo microscope, anti-static workbench, anti-static wrist strap.
3. The operation method of manual placement
1) Mount SMC Chip Components: Hold the component with tweezers, align the solder end of the component with the solder pads at both ends, place it on the solder paste in the center, and press gently with the tweezers to make the solder end dip into the solder paste.
2) Mount SOT components: Hold the SOT component body with tweezers, align the direction, align the pads, and place it on the solder paste in the center. After confirmation, gently press the component body with tweezers so that the pins immersed in the solder paste are not less than 1/2 of the pins thickness.
3) Mount SOP, QFP components: The pin 1 of the device or the front-end mark should be aligned with the positioning mark on the printed board, then use tweezers to hold or pick up the device with a vacuum pen, align it with the two ends or four sides of the pad, and stick it on the solder paste in the center. Then use tweezers to gently press the top surface of the device package so that the pins immersed in the solder paste are not less than 1/2 of the pin thickness. When mounting narrow-pitch devices with a lead pitch of less than 0.65 mm, it can be operated under a magnifying glass or microscope of 3 to 20 times.
4) Mount SOJ, PLCC components: The method of mounting SOP and QFP is the same, but because the pins of SOJ and PLCC are at the bottom around the device,we need to tilt the circuit board at an angle of 45°to check whether the chip is in a good position, and whether the pins are aligned with the pads.
After components are mounted, they can be soldered manually, semi-automatically or automatically.
4. Precautions
The pads must be clean before manual placement. The pads on the new circuit board are relatively clean, but after the old components are removed on the reworked circuit board, there will be residual solder on the pads. Before replacing components to the rework position, the solder remaining on the pad must be removed manually or semi-automatically, such as using an electric soldering iron, soldering wire, manual solder suction device or vacuum tin suction pump to suck the solder away.
HoYoGo is an international, professional and reliable PCBA factory, with our own production capacity, we are able to provide you with one-stop service for small, medium mass batch production. HoYoGo can also provide HDI PCB, gold finger PCB, hard gold PCB, flexible PCB, rigid-flex PCB, metal base PCB, and quick turn service.
评论
发表评论